Trong bài viết này mình xin giới thiệu đến các bạn một tính năng quan trọng trong Laravel là migration. Đối với php thuần, developer phải truy cập vào một database nào đó để tạo CSDL bằng câu lệnh SQL hoặc bằng giao diện. Nhưng cách này khá thủ công và bất tiện đối với một dự án có nhiều thành viên tham gia phát triển. Migration khắc phục cực kỳ tốt nhược điểm của cách làm thủ công trên. Hãy cùng tìm hiểu chi tiết nhé
1. Thế nào là migration?
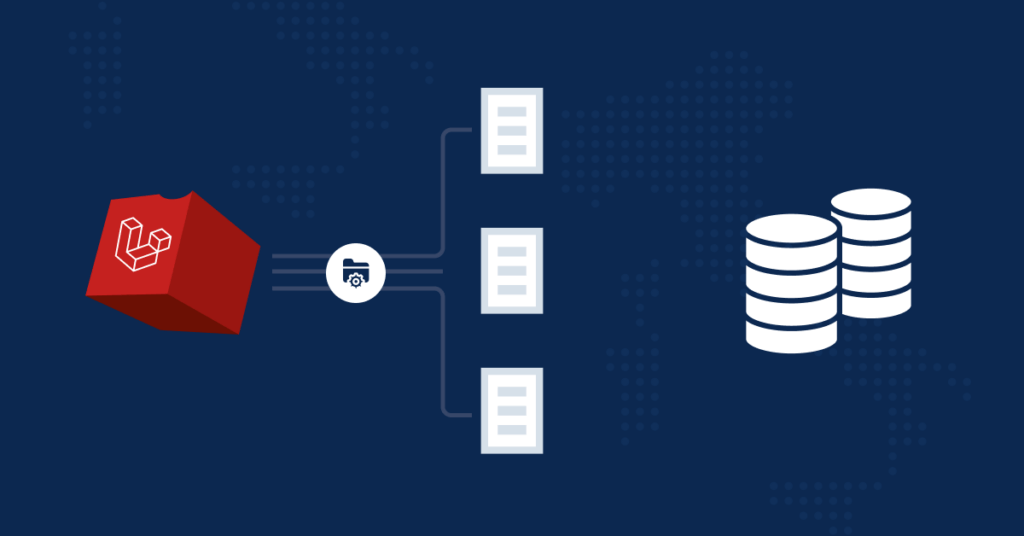
Migration giống như một version control của database. Một tính năng giúp quản lý tất cả các phiên bản của database. Nó cho phép team của bạn có thể xác định và chia sẻ cơ sở dữ liệu.
2. Cấu hình Database
Để sử dụng được tính năng migration trong laravel, trước hết phải cấu hình một database để laravel có thể kết nối tới. Có 2 cách cấu hình:
- Cấu hình database trong file .env (Thường sử dụng ở localhost)
- Cấu hình trong config/database.php (Sử dụng để chạy sản phẩm đã là product)
Để cấu hình database ở local, chúng ta thiết lập cài đặt ở file .env như sau:
APP_NAME=Laravel
APP_ENV=local
APP_KEY=YNX1ZSYWw1d6hjw3A5PzlP8aIF+2pesJFLX0=
APP_DEBUG=true
APP_URL=http://127.0.0.1:8000

LOG_CHANNEL=stack
LOG_DEPRECATIONS_CHANNEL=null
LOG_LEVEL=debug

DB_CONNECTION=mysql
DB_HOST=127.0.0.1
DB_PORT=3306
DB_DATABASE=laravel
DB_USERNAME=root
DB_PASSWORD=
Trong đó:
- DB_CONNECTION: là hệ quản trị cơ sở dự liệu sẽ kết nối
- DB_HOST: địa chỉ kết nối, đối với localhost sẽ là 127.0.0.1
- DB_PORT: cổng kết nối
- DB_DATABASE: tên database mà bạn đã tạo
- DB_USERNAME: tên tài khoản trên cơ sở dữ liệu của bạn
- DB_PASSWORD: mật khẩu cơ sở dữ liệu. Mặc định thường là rỗng đối với wamp hoặc xampp
Để cấu hình database ở product, cần thiết lập cấu hình trong file config/database.php
<?php

use Illuminate\Support\Str;

return [

    /*
    |--------------------------------------------------------------------------
    | Default Database Connection Name
    |--------------------------------------------------------------------------
    |
    | Here you may specify which of the database connections below you wish
    | to use as your default connection for all database work. Of course
    | you may use many connections at once using the Database library.
    |
    */

    'default' => env('DB_CONNECTION', 'mysql'),

    /*
    |--------------------------------------------------------------------------
    | Database Connections
    |--------------------------------------------------------------------------
    |
    | Here are each of the database connections setup for your application.
    | Of course, examples of configuring each database platform that is
    | supported by Laravel is shown below to make development simple.
    |
    |
    | All database work in Laravel is done through the PHP PDO facilities
    | so make sure you have the driver for your particular database of
    | choice installed on your machine before you begin development.
    |
    */

    'connections' => [

        'sqlite' => [
            'driver' => 'sqlite',
            'url' => env('DATABASE_URL'),
            'database' => env('DB_DATABASE', database_path('database.sqlite')),
            'prefix' => '',
            'foreign_key_constraints' => env('DB_FOREIGN_KEYS', true),
        ],

        'mysql' => [
            'driver' => 'mysql',
            'url' => env('DATABASE_URL'),
            'host' => env('DB_HOST', 'name-host'),
            'port' => env('DB_PORT', '8002'),
            'database' => env('DB_DATABASE', 'database-name'),
            'username' => env('DB_USERNAME', 'username'),
            'password' => env('DB_PASSWORD', '********'),
            'unix_socket' => env('DB_SOCKET', ''),
            'charset' => 'utf8mb4',
            'collation' => 'utf8mb4_unicode_ci',
            'prefix' => '',
            'prefix_indexes' => true,
            'strict' => true,
            'engine' => null,
            'options' => extension_loaded('pdo_mysql') ? array_filter([
                PDO::MYSQL_ATTR_SSL_CA => env('MYSQL_ATTR_SSL_CA'),
            ]) : [],
        ],

        'pgsql' => [
            'driver' => 'pgsql',
            'url' => env('DATABASE_URL'),
            'host' => env('DB_HOST', '127.0.0.1'),
            'port' => env('DB_PORT', '5432'),
            'database' => env('DB_DATABASE', 'forge'),
            'username' => env('DB_USERNAME', 'forge'),
            'password' => env('DB_PASSWORD', ''),
            'charset' => 'utf8',
            'prefix' => '',
            'prefix_indexes' => true,
            'search_path' => 'public',
            'sslmode' => 'prefer',
        ],
    ],

    /*
    |--------------------------------------------------------------------------
    | Migration Repository Table
    |--------------------------------------------------------------------------
    |
    | This table keeps track of all the migrations that have already run for
    | your application. Using this information, we can determine which of
    | the migrations on disk haven't actually been run in the database.
    |
    */

    'migrations' => 'migrations',

    /*
    |--------------------------------------------------------------------------
    | Redis Databases
    |--------------------------------------------------------------------------
    |
    | Redis is an open source, fast, and advanced key-value store that also
    | provides a richer body of commands than a typical key-value system
    | such as APC or Memcached. Laravel makes it easy to dig right in.
    |
    */

    'redis' => [

        'client' => env('REDIS_CLIENT', 'phpredis'),

        'options' => [
            'cluster' => env('REDIS_CLUSTER', 'redis'),
            'prefix' => env('REDIS_PREFIX', Str::slug(env('APP_NAME', 'laravel'), '_').'_database_'),
        ],

        'default' => [
            'url' => env('REDIS_URL'),
            'host' => env('REDIS_HOST', '127.0.0.1'),
            'username' => env('REDIS_USERNAME'),
            'password' => env('REDIS_PASSWORD'),
            'port' => env('REDIS_PORT', '6379'),
            'database' => env('REDIS_DB', '0'),
        ],

        'cache' => [
            'url' => env('REDIS_URL'),
            'host' => env('REDIS_HOST', '127.0.0.1'),
            'username' => env('REDIS_USERNAME'),
            'password' => env('REDIS_PASSWORD'),
            'port' => env('REDIS_PORT', '6379'),
            'database' => env('REDIS_CACHE_DB', '1'),
        ],

    ],

];
Trong đó tại trường ‘default’ => ‘mysql’, mysql là loại cơ sở dữ liệu bạn kết nối tới, bạn có thể thay đổi nó bằng sqlite, postgres,… Sau đó cũng thiết lập cấu hình cho loại cơ sở dữ liệu mà bạn đang sử dụng tương tự như ở local.
3. Cách sử dụng migration
Chúng ta có 2 cách chính để tạo một file migration.
Cách 1: Tạo thủ công bằng cách vào thư mục database/migrations tạo mới một file
Thường thì chúng ta không nên sử dụng cách này
Cách 2: Tạo bằng command line
– Tạo migration thông thường. Sử dụng command sau:
php artisan make:migration "migration-name"– Tạo mới migrations cho bảng
php artisan make:migration MigrateName --create=TableName– Tạo migrations chỉnh sửa bảng
php artisan make:migration MigrationName --table=TableName4. Cấu trúc của một file migration
<?php

use Illuminate\Database\Migrations\Migration;
use Illuminate\Database\Schema\Blueprint;
use Illuminate\Support\Facades\Schema;

return new class extends Migration
{
    /**
     * Run the migrations.
     */
    public function up(): void
    {
        Schema::create('users', function (Blueprint $table) {
            $table->id();
            $table->string('name');
            $table->string('email')->unique();
            $table->timestamp('email_verified_at')->nullable();
            $table->string('password');
            $table->rememberToken();
            $table->foreignId('current_team_id')->nullable();
            $table->string('profile_photo_path', 2048)->nullable();
            $table->timestamps();
        });
    }

    /**
     * Reverse the migrations.
     */
    public function down(): void
    {
        Schema::dropIfExists('users');
    }
};
Chúng ta có thể thấy, trong file migration có function up() và function down() và để ý kỹ hơn chúng ta sẽ thấy hàm Facade Schema. Vậy chức năng của chúng để làm gì ?
- function up(): Có tác dụng thực thi migration
– Khi muốn tạo mới một column thì sẽ viết mới trong function up(). Có nhiều loại type mà Laravel đã cung cấp sẵn để tạo một column ví dụ: id, integer, text, datetime,…
- funtion down(): Có tác dụng thực thi đoạn lệnh rollback
– Trong hàm này sẽ thực thi các câu lệnh đảo ngược với function up()
- Hàm Facade Schema: Là hàm Facade mà Laravel hỗ trợ để thực hiện các chức năng như create, update, delete bảng
5. Cách chạy file migration
Sau khi tạo các migration, chúng ta chạy nó bằng command sau:
- Chạy các migration:
php artisan migrate- Chạy lại migration:
php artisan migrate:refeshLệnh này nhằm rollback toàn bộ CSDL đồng thời chạy lại luôn toàn bộ các file migrate đồng thời chạy tấy cả các seeder.
php artisan migrate:refresh --seed - Rollback migration:
php artisan migrate:rollback6. Kết luận
Đến đây mình hy vọng các bạn đã hiểu cách hoạt động của migration, cũng như áp dụng tạo migration thành công. Hy vọng bài viết sẽ mang lại nhiều thú vị cho mọi người. Xin cảm ơn!

